DIY CNC Build Logs
Devastator’s Ongoing Solsylva Build
CarveOne’s Solsylva 25x37 Router Build
Marcdavis - First machine build Solsylva 25x25
TOPICA’s solsylva 25 x 25 twin build
Pictures of Solsylva™ machines shared by builders
FanofDocumentaries - Solsylva 10x9, truing holding/waste board
TheHandyman - Newbie - My CNC Router Build
- Wood frame
- rails
- Stripped computer box as CNC controller box (Nice)
TheHandyman - Newbie - My CNC Router Build
What spindle? new 1.5kw spindle and vfd
CarveOne’s Steel Channel Rebuild
CarveOne’s Steel Channel Rebuild
This is going to be a complete rebuild of my first CNC machine, the red oak Solsylva 25x37. Stiffness and extra mass is the goal.
microcarve - My Newest Desktop machine
microcarve - My Newest Desktop machine
Description post
Hi Nelson,
Thank You…
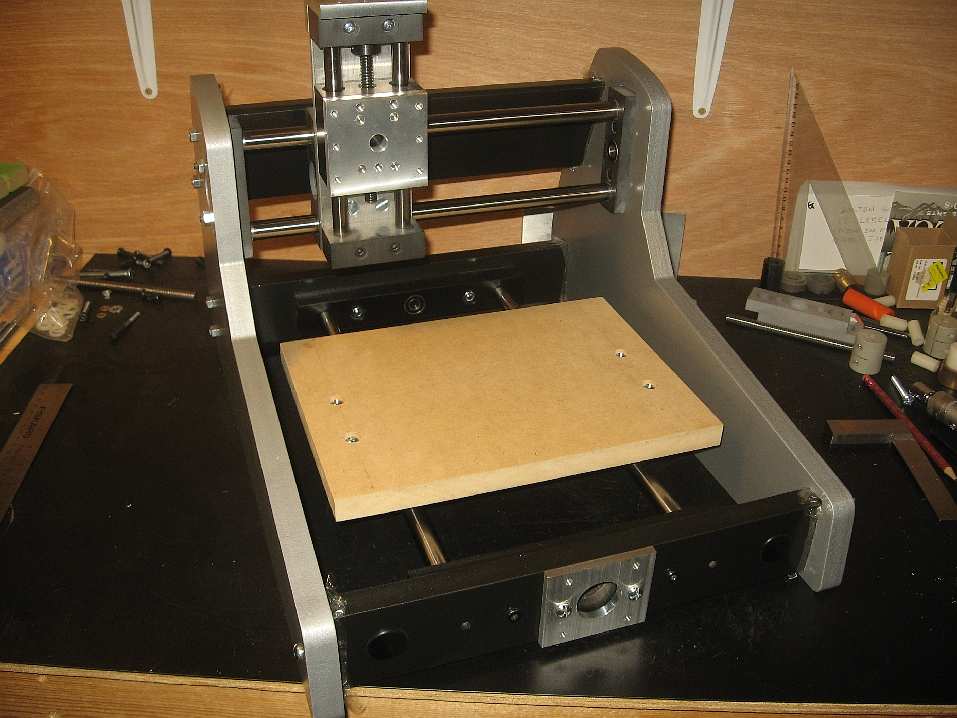
I think it’s a pretty good design. It’s a very rugged and durable little machine. I’ve always liked the fixed bridge design for the extra rigidity it provides. The only thing is has against it, is the small cutting area. But this one was intended to be a small machine anyway. Not everyone has space for larger machines. It’s very portable and easily enclosed for use in places like apartments where many people live….
The rails are 5/8” Thomson linear shafting. They’re very nice precision rails that don’t flex at the relatively short lengths….14” for the bridge/gantry, and 16” for the front to back axis….
(depending on how it’s set up in software and positioned in an enclosure, someone may call either axis X or Y…)
It uses common inexpensive Oilite bearings. The fact that they’re “cheap” is really just a plus, as they’re ideal for these sort of small machines. I’ve used them for many years in many sizes of machines, including MDF , plastic and all metal machines. They will push dust and debris away and act as self cleaning bearings. Easily cleaned if need ever be.
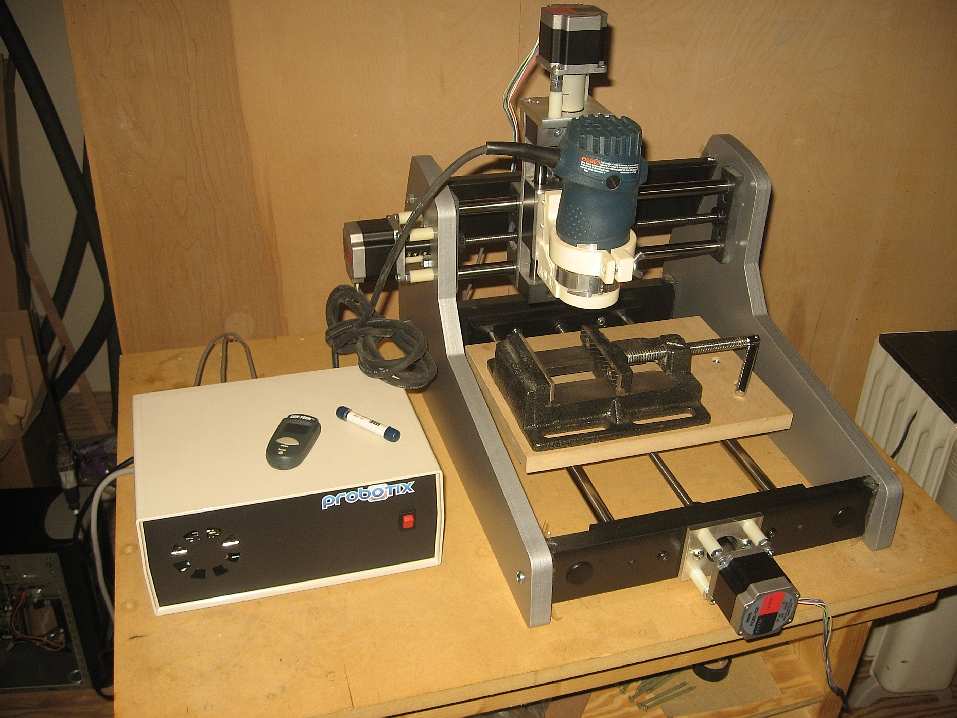
The lead-screws are 3/8-12 Acme, with Delrin nuts. With the Probotix driver setup shown, at 1/4 stepping, the machine will move at 80IPM, though it’s really intended to go around 30-40IPM max for tiny, precise carving work.
It is an MDF frame. It’s designed so the MDF frame holds the working parts in place. At these small sizes, the MDF thickness…at 3/4” is enough to provide very strong and reliable rigidity. The rails are held in place using 3/4” black HDPE and cast urethane blocks. They won’t flex at all, and the combination of materials practically cancels any transfer of vibration and resonances. Meaning it’ll do very precise and highly accurate work.
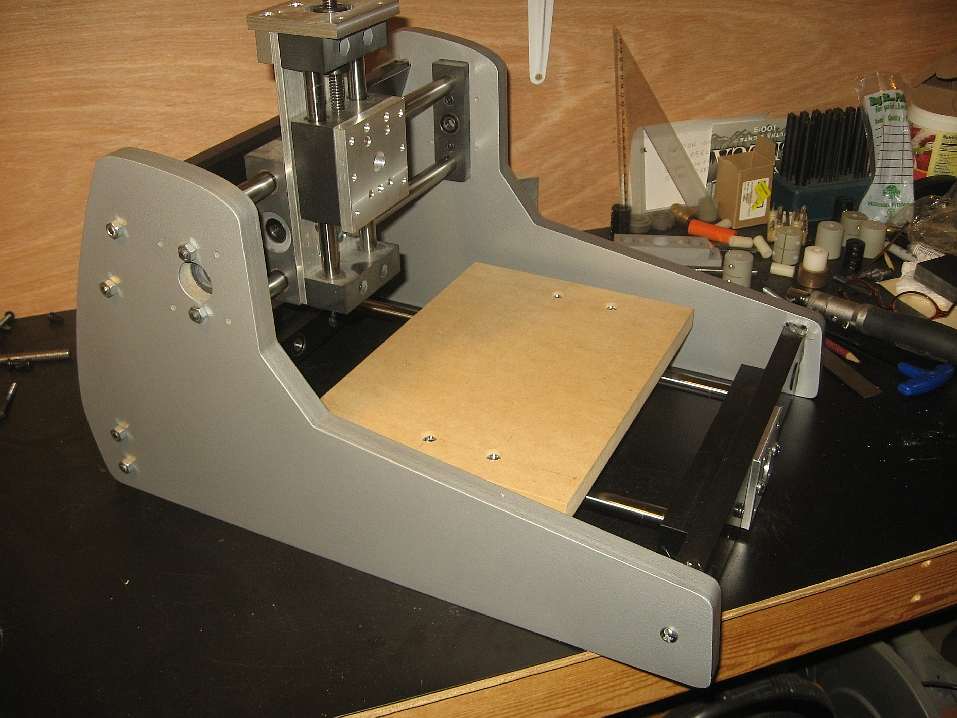
The painting is several layers of Rustoleum Hammertone paint. It’s taken a lot of trial & error to finally figure out that the easiest way to get a good durable and inexpensive finish, is to be very patient and let it dry for several days.
The hammertone type paints give it a thicker, but stickier coating pretty easily without too much “running” of the paint between coats. The extra thickness makes a glossy heavier coating, but the stuff has to dry a lot longer than the Krylon paints I normally use. So I have to give it 3-4 days to completely dry. It’s well worth the extra waiting, because the finish ends up very durable and similar to powder coating.
I didn’t even bother sealing it like I normally do, because the extra thickness of those hammertone paints sealed the edges well enough on their own.
It’s a very nice little desktop machine. I think it’s probably capable of some very fine PCB work…though I don’t do pcb’s myself. It’s strong and rigid enough that it may do some light aluminum milling too.
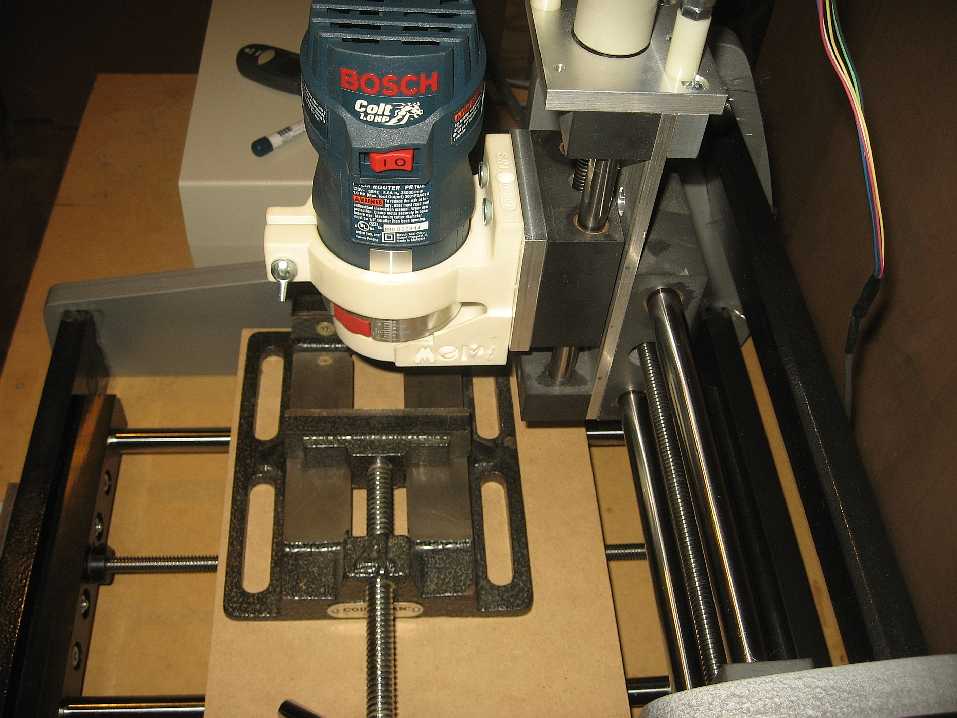
The key thing is that all the parts are very, very strong and rigid at these relatively small sizes. The only hard part to building it is that all the holes must be bored and drilled in exact right places to be as smooth and accurate as it is. There’s no ‘slop’ at all in the machine.
It has some nice weight to it at around 40 lbs. It should fit well on most workbenches…it’s 19” high, 19” wide and 24” deep with these smaller nema 23 motors attached.
These motors don’t have the extra shaft on the outside…which I wish they did. I like to put handles on them for hand positioning everything sometimes.
cffellows - Small Desktop CNC Router
The inspiration for my design comes from Microcarve’s MV2 and BBox routers with a lot of my own changes.
cffellows - Small Desktop CNC Router
Interaction of cffellows and datac is informative.
RicknBeachcrest - My 8020 router build
Used Aluminum plate from Midwest Steel Supply
Senna - 8020 ErectorSet Router…
LS120 - LS120’s Solsylva 24 x 48 build.
LS120’s Solsylva 24 x 48 build
Devastator - Devastator’s Ongoing Solsylva Build
Devastator’s Ongoing Solsylva Build
jlowe1224 - Solsylva 25x25 CNC Build Log
jlowe1224 - Solsylva 25x25 CNC Build Log
Devastator - Re: Solsylva 25x25 CNC Build Log
Devastator - Re: Solsylva 25x25 CNC Build Log
Any regrets with your solsylva that you would have done differently?
Yes, I would have used more studs to support the pipes, only steel angle for the bearing mounts (not aluminum), more reinforcing angled steel on the beams from the start instead of adding it later. Using home made laminated LVL’s from the start instead of the 2X lumber. Starting with a torsion box bed instead of the flimsy framing lumber. Basically everything I had to do two or three times over to get the machine to do what I needed. Think heavy. If you want a good wood machine, it should be heavy. I think mine weighs about 1,000 lbs with half of it being the torsion box bed.
Whatever you do, don’t use those bent aluminum bearing mounts, use half round nuts on the insides of the pipe because if you don’t it will distort, and despite what the instructions say, it is a problem. Solid rod on the Z instead of hollow pipes.
The basis of the Solsylva design is a springy machine. Well, a springy machine will chatter like crazy, so you want to design the springyness out.
Devastator recommends torsion box
Build a Torsion Box Assembly Table http://www.finewoodworking.com/woodworking-plans/video/build-a-torsion-box-assembly-table.aspx
Build a torsion box for a flat and rigid workshop tabletop
Marc Spagnuolo
louieatienza - First CNC, modded Solsylva plans, finally!
louieatienza - First CNC, modded Solsylva plans, finally!
youtube - My first CNC build Solsylva plans
louieatienza cuts aluminum
Re: cutting aluminum with a CNC router
Originally Posted by Tkamsker View Post
Hi loulelatentia you recommend ation is ok on an heavy vmc but if you use a Router you are in an different Ballgame but if our friend has then spent a lot on Millers He can choose which way to work I use a Bosch router on a home made CNC. And I have the videos to prove it’s more than feasible. If you don’t use at least the minimum chipload recommendation you’re just making aluminum powder and wearing out your tools. Don’t believe me? I have a thread stickied above this forum on endmills and bits and I discuss my parameters for cutting aluminum and links to some example videos.
On a VMC there is absolutely no limit on how fast you can machine aluminum other than the speed of the machine itself. But the principles are atill the same. Use the recommended chipload to figure out your feedrate for the particular tool, then adjust your axial and radial DOC to suit the power of your spindle and rigidity of your machine.
Now if you have access to CAM with high speed trochoidal footpaths you can actually overcome some of rhe limitations of a home brew machine as I also show, though that software costs more than most machines here. Barring that, for routers, single edge spiral o flute bits can get you cutting aluminum easier with the higher speeds of routers and spindles which I also demonstrate. I highly recommend Onsrud 65 series because it utilizes a sweep at the bottom of the bit leaving a cleaner pocket floor. Why single edge? So you can maintain at least a minimum chipload using a router at feedrates reasonable for hobby machines.
And no, I don’t recommend these parameters and rools from a VMC background, but from experimenting and wrecking tools and workpieces, at a time not too long ago when I could find no or incorrect information was to be found.
Re: cutting aluminum with a CNC router
To give you numbers, for a 1/4” endmill I use a chipload of about .0025” which is just under the recommended chipload. I use a Bosch. 1617 with a Super PID controller set to 12800rpm. That’s 32ipm per flute. I now use 2 flute endmills designd for aluminum, so that’s 64ipm. Stepover or radial DOC maybe 10-12% depending on job. For pocketing I use 1/2D for DOC, and 1/4D for slotting or profiling. Why? Slotting means full tool engagement, so the load on the tool is increased. When pocketing you (hopefully) are using more of the flank which is more efficient at cutting than the bottom.
I will use a single flute bit for slotting because of better chip clearance, then finish with a 2 flute if I require a better surface finish on the edge, but the single flute cuts pretty well for most my stuff.
Also, whenever possible, use stub endmills. Nothing guarantees failure more than a tool sticking out an inch and a half, and you’re taking .020” passes. The closer the collet to the work the better.
<a href="" target="_blank"></a>
        <img src="" width="400px">